intro

A sharing of ideas, techniques, successes and failures in the volatile world of pottery and family life.

Wednesday, October 19, 2011

Customized Pottery Packing for Craft Shows - Small Items

Since I started this blog I've struggled with sharing relevant info.  I'm not one to post for the sake of posting and my life's not interesting enough to use it as a journaling tool.  I want to share things that others will find helpful or insightful.  I want to leave a positive mark not just add to the cyber noise.  So what can I share?  My expertise is...  Well, not very expert.  I'm a pretty good potter but by no means a master.  I'm a wife of 21 years and a mom of almost 19 years and still looking for the instruction manuals.  Some days I feel like I've got less than nothing to contribute.

Today, however, is your lucky day!  I've been stewing on a problem for a few weeks now and solidified the resolution enough to give it a try yesterday.  It worked beautifully (well, not visually) and I'm hoping some of you will find it helpful.

I've been doing craft shows for a few years and I usually am on my own.  During my last show a few weeks ago my dad made the mistake of stopping by close to the end and found himself helping me pack up.  Lucky for me but I'm sure he'll time it better in the future. Now, for any of you who do the craft show circuit you know the bane of the process is setting up and breaking down.  Well, for potters, glass artists or anyone with fragile product the packing is slo-o-o-ow!  Have you ever moved?  Remember packing your dishes and glassware?  Every piece needs to be protected from breakage even if you're only going across town.  Now imagine having to do that every weekend.  YUCK!  I'd wrap every piece in newspaper and stack them carefully in the boxes.  I have the boxes labeled but at the end of a long day I'm not so careful whether I get everything in it's proper place.  Hence, I'm always one of the last crafters loading up my car at the end of the day.  DOUBLE DOG YUCK!  (and, yes, I used the word "hence"!)
The old packing hodge-podge

During our weekly phone call Dad and I were discussing possible solutions to my packing issue.  How can we make it quicker and still protect each piece and keep it organized? You've probably seen those fancy moving boxes with the cardboard dividers.  We were thinking along those lines.  Unfortunately, our pottery varies in size from spoon rests to large bowls and birdhouses and everything in between.  So I needed to customize.


The new Beautifulness!
Maybe I'm coming late to the game and you're sitting there shaking your head because this isn't as awesome of an idea as I think it is.  Too bad!  It's not often I impress myself and I'm still reveling in the prospect of leaving a show less than an hour after it ends.

In case you're mildly impressed and think this would help your craft show experience be less stressful I'm sharing my process.  Obviously, you'll be adapting to fit your own needs but you'll get the general idea and I'll be happy to help you out if you have questions or get stuck.  (And thank you, Mr. Huckle, for high school drafting class!)


Tools you'll need:
  • Graph paper or make your own
  • Calculator (maybe)
  • Pencil
  • Utility knife
  • Scissors (maybe)
  • Metal ruler or straight edge and ruler
  • Old cardboard box
  • Hot glue gun w/glue (maybe)
  • Recycled packing material
  • Snacks (optional)

Here are the steps:
The plan

The notched walls
Putting it together
Loading it up
  1. Measure the interior of the box/bin.  This bin's interior measures 20" wide x 14" deep x 5" high.
  2. Measure your items.  It's easier if you have similarly sized items to give you equal spacing.
  3. On the graph paper map out the plan.  This bin holds the spoon rests which need a space about 4 inches wide by 1 inch deep.  I have 30 spoon rests so my calculations gave me 2 rows of 14  and the extra 2 spoon rests will have to be relegated to another area. 
  4. Take your cardboard (I used a sneaker box for this grid but will need sturdier material for larger items), utility knife and metal ruler measure and cut the main pieces of your grid.  In the example I had 2 pieces 14" x 4" (side walls), 4 pieces 8 1/2" x 4" and 9 pieces 8" x 4" (cross walls).  You don't need cardboard on the outer sides.  My grid doesn't fill the whole bin so the 8 1/2" pieces are so I can fold the end to make a tab to glue to the outer side wall for stability.  If your grid fills the whole bin you only need inner walls and no tabs.
  5. Now you need to cut a notch for each intersection.  Each notch should only go up half way.  I cut one notch 4" from the end of each 8" & 8 1/2" piece and 13 notches 1" apart in one of the 14" side walls.
  6. Now you can slot everything together. 
  7. Line the bottom and outer walls of your bin/box with padding material.  (mine's recycled shipping material.)
  8. Insert your grid and load up your inventory!  For the left over space I've stacked some flat items with a sheet of thin foam or bubble wrap layered in between and 1 inch foam around the sides.  Not a scrap of newspaper to be found!
  9. Add another layer of padding on top (we don't want things hitting the lid when we can't avoid that pot hole!)
  10. Time how long it takes you to unload and load at your next show and report back to me.  I don't have another show until November and the suspense is killing me!
Next I'll be working on packing medium and large housewares and my birdhouses and banks.  Here's the link.

Sunday, October 2, 2011

Push-me-pull-you

Shortly after graduating high school I worked at a florist starting as a driver then learning floral design and working in the shop.  After 2 years of starting in August to prepare for Christmas I couldn't do it any more and quit.  It made me feel like a Scrooge dreading Christmas, which is one of my favorite holidays.

This weekend was our first craft show for the fall/holiday season.  This is the earliest that we've done a fall show and my mindset is focused on the harvest season and Thanksgiving.

The show was in a church and vendors were spread throughout the building.  When the show started at 9:00 music started playing in the foyer, which was about 10 feet from the "Board Room" where I was set up with one other vendor.  A gentleman came in with a little boom box and asked if we would mind having music playing in the room.  Since my roommate was occupied he directed the question to me.  I declined because I've found the music can be distracting and just adds to the din when there are a lot of people in a small space.  As shoppers started coming (we had a very good show) I didn't even notice the music.  When it started quieting down after lunch I noticed it again.  It was Christmas music.  Of course!  What else would they be playing?

I'm sure there have been hundreds of marketing studies done on the effects of music on shoppers and being a vendor I want the shoppers to buy my amazing items.  ;-)   But as a shopper I cringe when I hear Christmas music before Halloween.  Probably because I've been a shopper longer than I've been a vendor I still have that negative reflex.  It was clear that many of our customers were gift shopping so maybe the music helped.  I just need to embrace my cringes and accept my roll in the pre-holiday madness. (heavy sigh)

Thursday, September 15, 2011

Treasuring the family drama

It's been 15 years since we've had a legitimate ER visit with our kids. With three boys, who have a father who's parents were on a first name basis with the ER staff, I consider this a major miracle.

I said "legitimate ER visit" because we had a "false alarm visit" with the whole shebang: EMT's and an ambulance ride. Our middle boy fell out of a tree when he was 7 or 8. His brothers came to fetch me from the house and I ran out to find him laying on his back crying "Ooow! My back hurts! I can't move!". Hence, the EMT's were called in. He was immobilized and carted to the hospital in style. After a thorough exam, including x-rays, they cleaned the large scrape on his back that he had gotten from falling against the tree and sent us home. Very anti-climactic, huh?

Now for the drama. Our oldest boy had broke his arm when he was three. That was our first ER visit. He now works in a sheet metal fabrication shop and caught his finger in one of the machines yesterday. He had an open fracture and is now all stitched back together and resting in front of his video games. Poor baby!

I know. You're thinking "That's it?" and you're 100% right! Our family has had it's share of major drama but, thankfully, not directly involving the boys. We have been so blessed with healthy children and when little things like this happen to them I thank God because it can always be so much worse. I know parents whose children have addictions, chronic illnesses, life changing injuries or have died. My heart brakes for them.  We are so blessed!

So I'll take our little doses of drama and put them in our treasure box because everything that's put in our path, good and bad, is a challenge. How we deal with our challenges is what defines our character.

Monday, September 5, 2011

The proof is in the birdhouse???

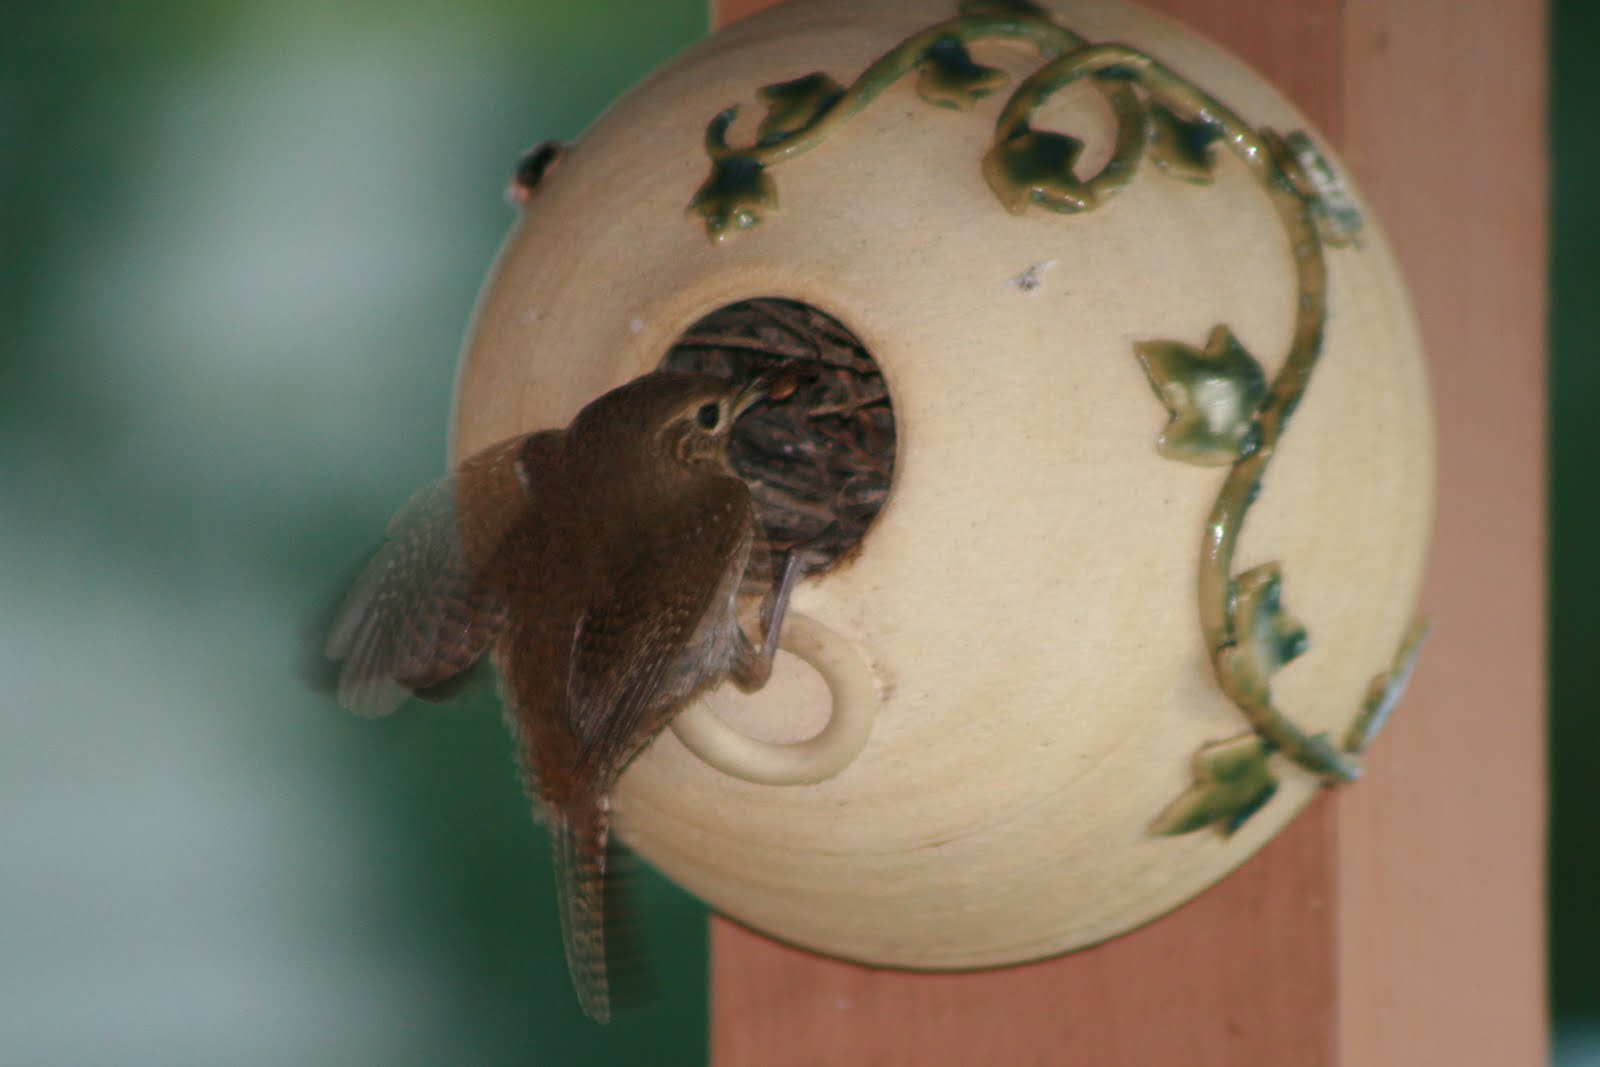
This past summer has proven to be monumental in the development of our birdhouses.  We have quite a few of them on our deck, trees and patio.  We started putting them on our deck for decoration but last year put some in trees and under the deck (which is on the 2nd story) to see if we could get any birds to nest in them.

One birdhouse was in a grove of poplars in the middle of our yard and I'd seen a bird going in and out of it but couldn't make out what breed it was.  My dog, Oliver, was sniffing around at the base of the tree one day acting kinda funny.  When I went to investigate I found a baby blue bird on the ground!  Oliver and I sat back and watched as the momma coaxed the baby to fly.  The birdhouse they happened to habitate in was a baby blue fish.  Ironic, huh?  Unfortunately, I was so excited, I didn't think to get my camera.

A few weeks later, while resting in the shade after weeding (my favorite!) I heard a fluttering ruckus nearby and looked up to discover a house wren going into a birdhouse under the deck!  I think I actually clapped my hands (yes, I'm a dork!)  I sat very still and strained to hear tiny chirps.  We had several babies!  More claps.  I ran for my camera and started shooting.  All I can say is "Thank heaven for the person who invented digital photography" because I would have had to pay for several rolls of film to be developed to get the half dozen good shots I ended up with.


As if this wasn't enough excitement, Mother Nature has also proven to be no match for our birdhouses!  We experienced a 5.8 earthquake on Aug. 23 followed by hurricane Irene later that week.  They all survived unscathed! 


Can't wait to see who moves into the neighborhood next spring!

Friday, August 26, 2011

A little insight to my process

A 3 lb. lump of muddy clay.


Ready to be bisque fired,
then glazed and re-fired to cone 6 (2232 degrees F).
Home sweet home for some lucky birdies!

Saturday, August 20, 2011

Upcoming Craft Shows

I just wanted to share some of the Holiday craft shows we'll be selling at this fall:
  • October 1, 2011 - Holiday Craft Faire, Bethlehem, PA from 9:00 - 3:00   www.easthillshcf.org

  • November 12 & 13, 2011 - Whitehouse Fire Co Craft Show, Whitehouse Station, NJ from 10:00 - 4:00  www.whitehousefirecompany.com/craft-show

  • December 3, 2011 - Crafts in the Warren Tech., Washington, NJ  from 9:00 - 4:00 
These are all well attended shows in which all vendors go through a jury process to ensure only high quality, handcrafted items.  

Hopefully, we'll be adding more shows as we get additional confirmations.

Please come out to do some shopping and stop by our booth to say "Hi" and  mention this blog post to get a discount!